Simple Tips for Creating a Custom Portal
One of the many great features of Media Shuttle is the ability to create a custom look and feel for your portals.
There are several components that can be changed to match your corporate branding or customer projects to give portal users a positive experience when exchanging files with you. Below is an overview of the customizable components and a few best practices for creating a great looking portal.
Portal Name and URL
During the process of assigning a portal and storage location, which is done through the IT user interface, you can create a custom portal name and URL prefix. You can choose your company name, the name of the project, or any other name that works for you. The name of the portal will appear both on the web page, but also in any email communication.
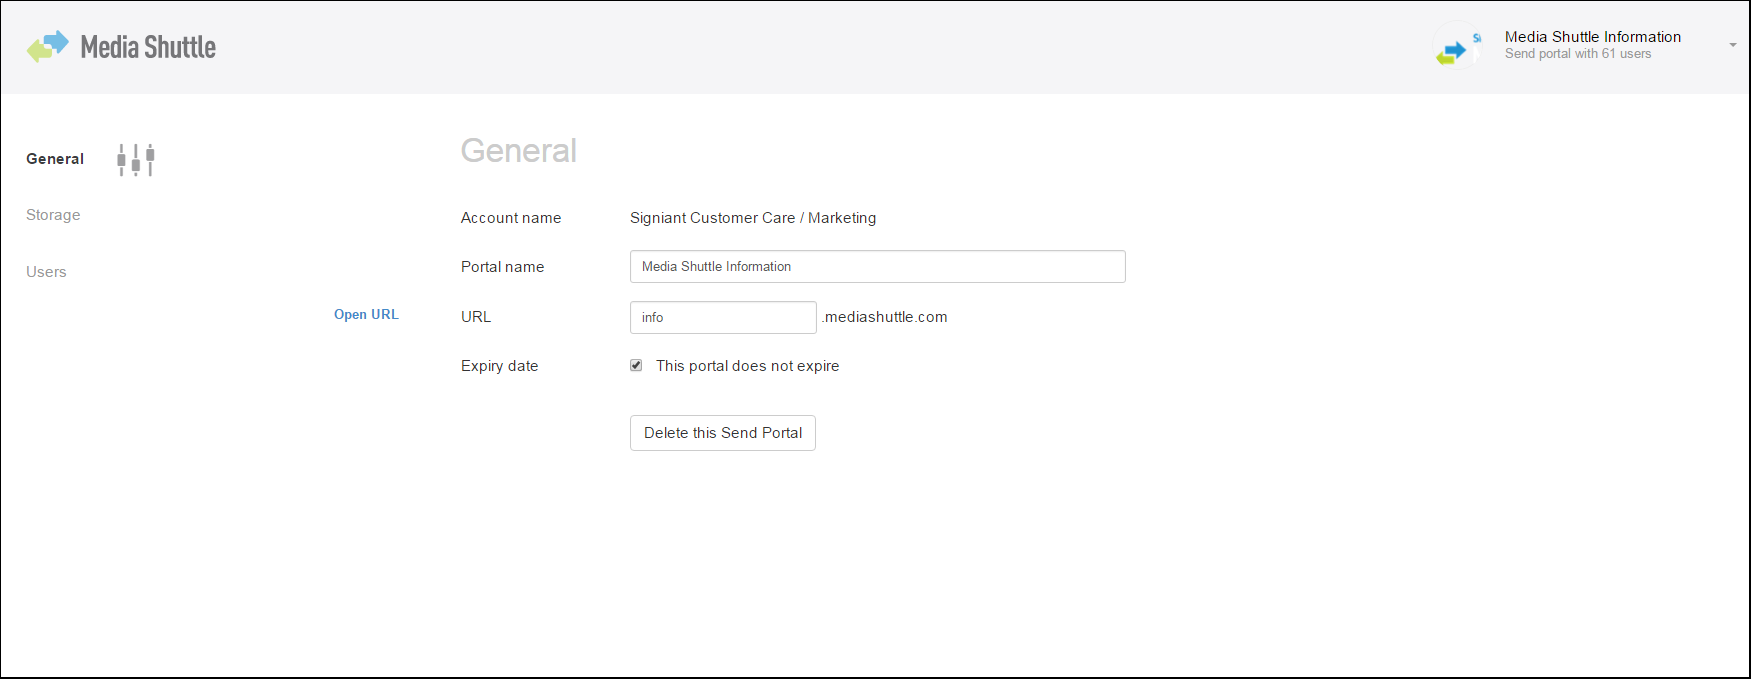
Portal Language and Footer
Media Shuttle portals can be set to display communication in one of six different languages: English, French, Spanish, Portuguese, German and Italian. The footer within each portal is also fully customizable. Users have the opportunity to add any content they’d like to the footer, in any language, and can also apply basic HTML to create links. Both of the portal language and footer changes can be applied through the portal administration interface under the General section.

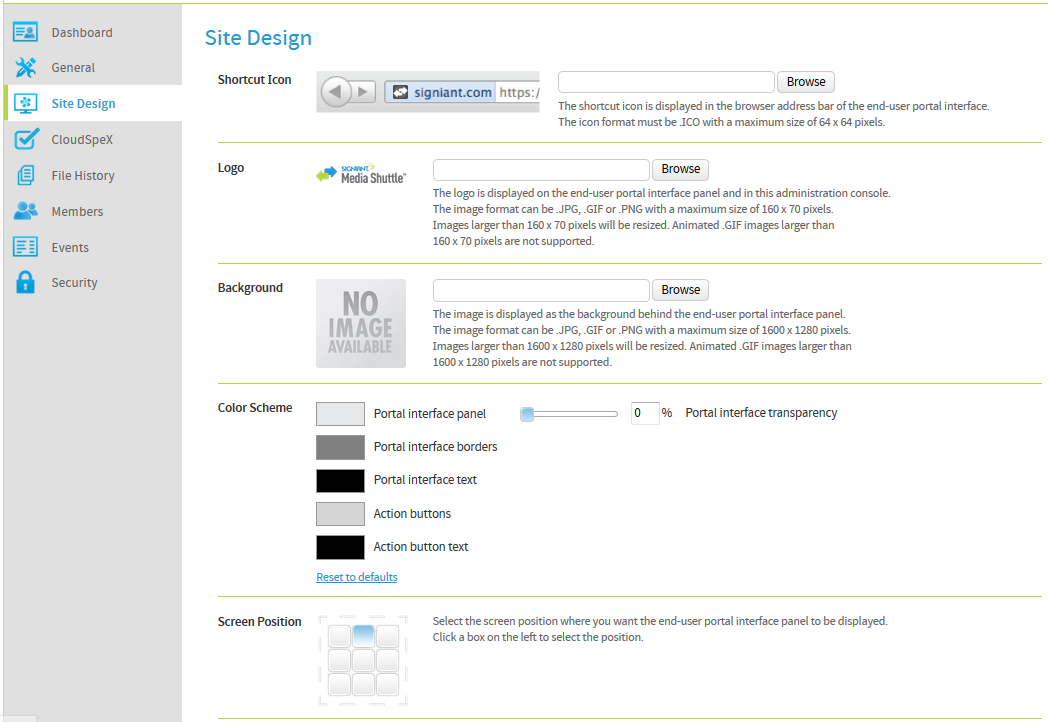
Portal Design
There are several components of the portal design that can be customized including the shortcut icon, the logo, the background image, the color scheme, and the position of the portal box on the page. This is the area where you can apply your own branding and colors to match your other corporate assets or projects. Changes can be made on-the-fly anytime you’d like, and as many times as you’d like by logging into the portal administration interface under the Site Design section.
Best Practices for Creating a Good Design
- Add images and colors that are recognizable by your users; that will help them feel like they are in the right place and are delivering their files where they should be.
- The most important component of the portal is the transfer box. Choose a background image and complimentary colors that will allow the transfer box to remain the focal point of the web page. You want your users to be able to know immediately what to do when they visit the page, not be distracted or confused by the background.
- The portal web page is responsive. In other words, the page will adjust to create optimal viewing experience at any size or for any device. One way to see what your portal will look like is to view it in a browser on your desktop. Then shrink or expand the browser and you’ll notice how the image adjusts; or simply look at the page on different devices. It’s best to choose and image that renders well at different sizes.
- When a logo file is added to the portal and the changes are saved, the portal will automatically apply a complimentary color scheme. For many users, this automation is adequate for their needs. For other users, they like to apply custom colors – including matching corporate PMS color standards – which can easily be done by clicking on the color palette. And some users like to simply use the sliding scale to choose a color that compliments the background image.
- Choosing a background image is very simple, but sometimes images are chosen that appear fuzzy on the portal. That means the image resolution is too small. The best ones are large, high-resolution images; particularly images that would work well as a desktop background. As a bonus feature, you can also use a high-resolution animated .GIF file and the animation will be visible by portal visitors.
Media Shuttle customers can create and customize as many portals as they choose, so setting up a portal for every project or partner is a quick and easy task. It’s a great opportunity to extend your brand and create a professional, visually appealing corporate asset for transferring files.
To learn more about getting your own Media Shuttle subscription, contact us today and we’d be happy to provide a personalized demo and answer any questions you have.